Happy Spring!
I enjoy celebrating the seasons. Not necessarily from a pagan perspective, but from a naturalist perspective. I love the changing seasons and all the natural cycles that are dictated by these changes.
As one season fades into the next, I feel an internal change; a shift towards something positive.
I like to think it is me growing more and more into myself as I age.
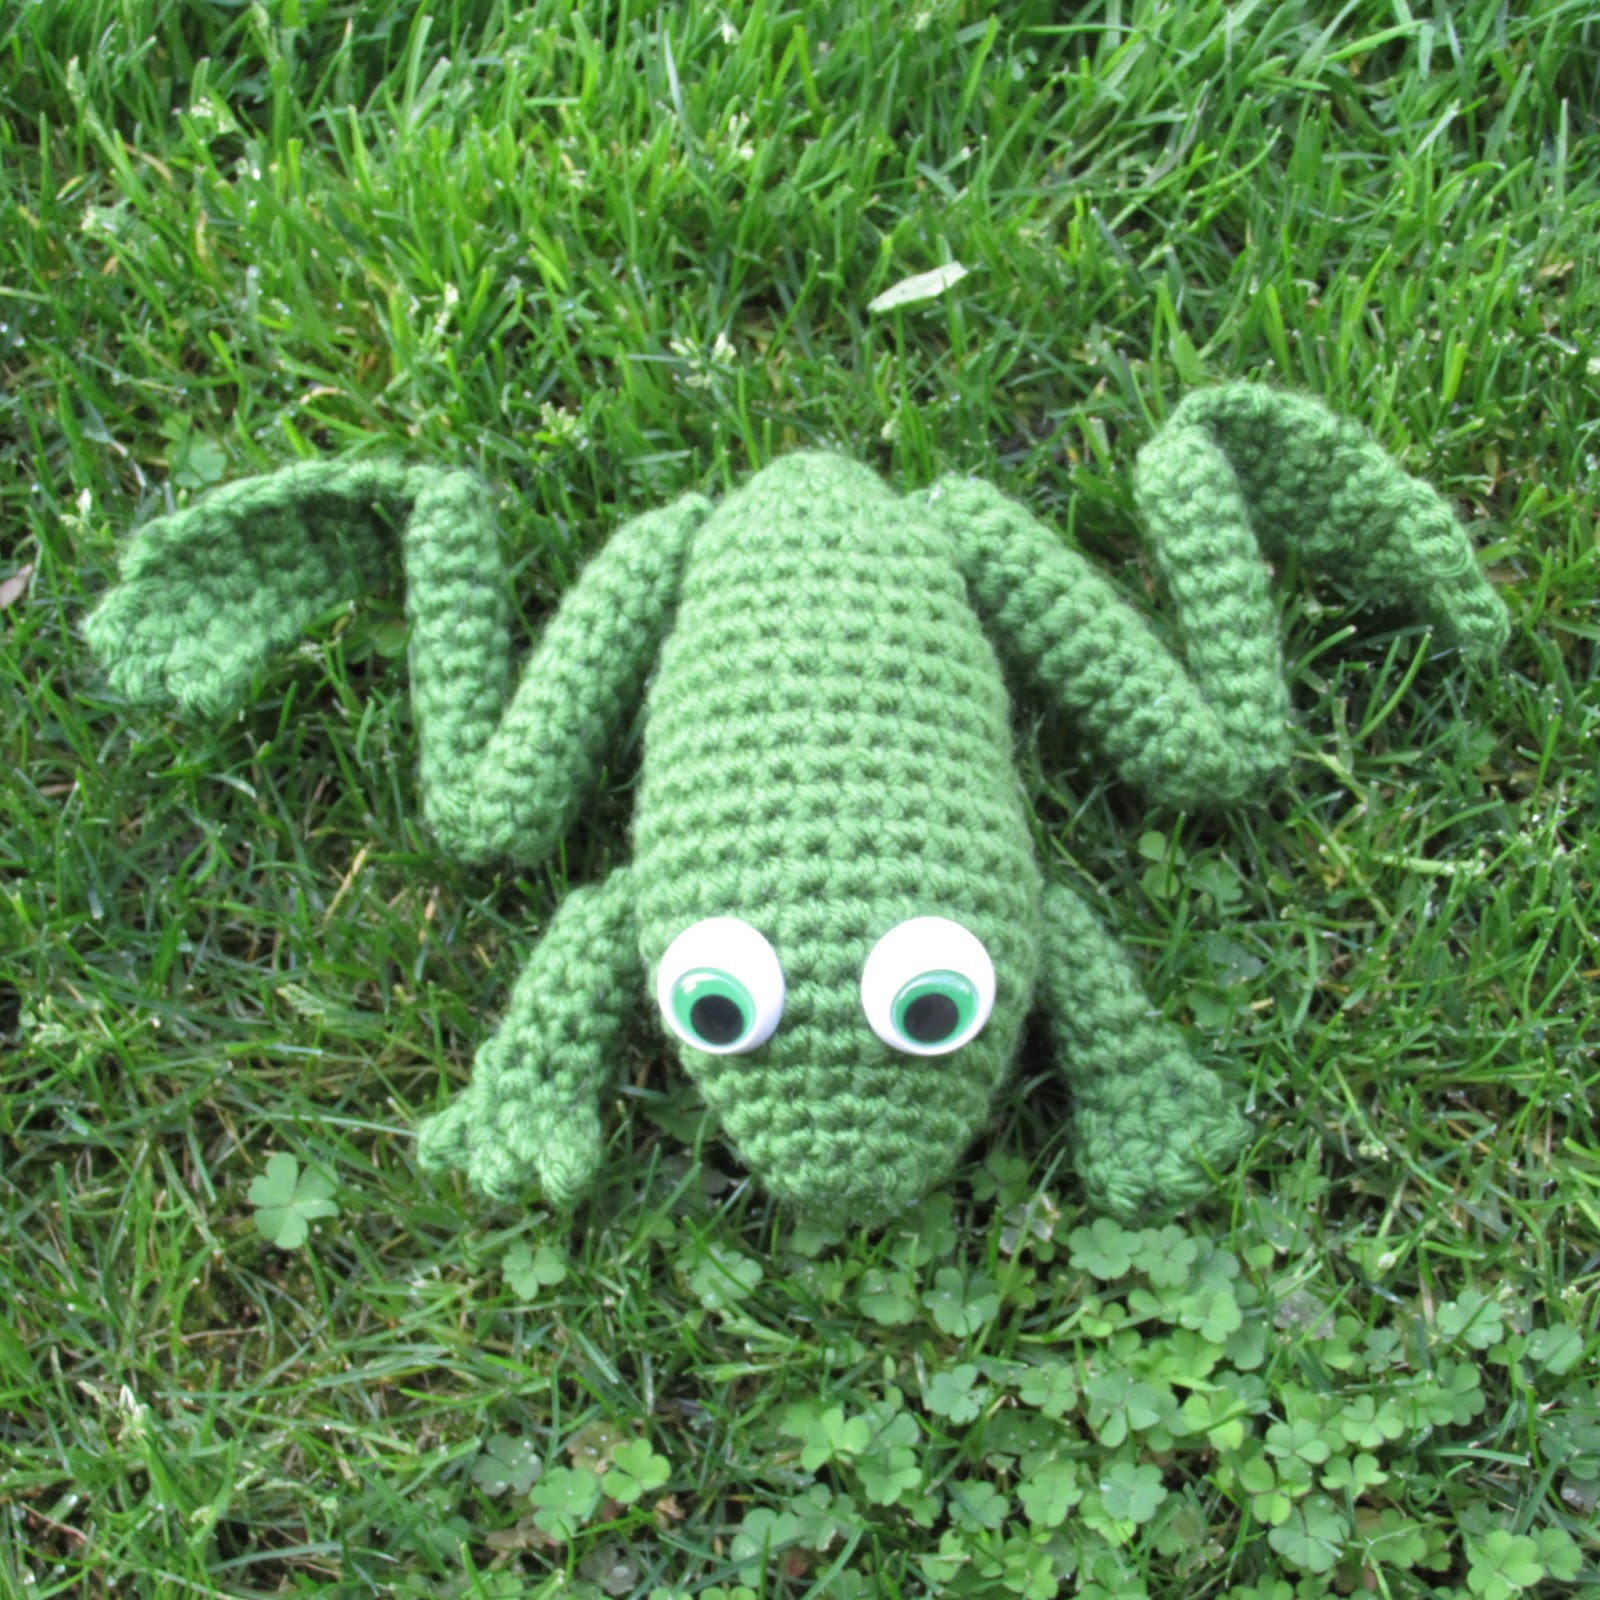
I made my toddler a Bullfrog amigurumi as a Spring gift.
I am sharing the pattern with my readers (few as they may be) in celebration of this beautiful season of life and new beginnings.
Enjoy!


Bullfrog Amigurumi
Gauge and yarn weight will determine the final size of your ami. I used worsted weight and held two strands together throughout, and an H hook. For eyes I used a pair of safety eyes that were gifted to me. They seem to be a combo of googly and safety eye. Regular safety eyes will also work. You can use buttons or make eyes out of felt or yarn. Be creative!
Head and Body: worked in the round
Rnd 1: 6 sc in a magic ring (6)
Rnd 2: 2 sc increase in each st around (12)
Rnd 3: sc in each st around (12)
Rnd 4: (2sc increase in first st, sc in next st) repeat around (18)
Rnd 5: sc in each st around (18)
Rnd 6: (2 sc increase in first st, sc in each of next 2 sts) repeat around (24)
Rnd 7: sc in each st around (24)
Rnd 8: sc in first 6 sts, 2 sc increase in next st, sc in next 13 sts, 2 sc increase in next st, sc in last 3 sts (26)
Rnds 9-12: sc in each st around (26)
Place safety eyes between rounds 7 & 8
Rnd 13: sc in first 7 sts, decrease, sc in next 10 sc, decrease, sc in next 5 sts (24)
Rnds 14-16: sc in each st around (24)
Rnd 17: sc in first 6 sts, decrease, sc in next 9 sc, decrease, sc in next 5 sts (22)
Rnd 18: sc in first 5 sts, decrease, sc in next 8 sts, decrease, sc in next 5 sts (20)
Rnd 19- 20: sc in each st around (20)
Rnd 21: (decrease, sc in next st) repeat 6 times, decrease in last 2 sts (13)
Rnd 22: (decrease, sc in next st) repeat 4 times, sc in last st (9)
Rnd 23 : decrease a final time and leave the rest of the round unworked, finish off & leave tail slightly long to sew body shut with
Stuff & weave yarn through last 8 sts, pull tight and tie off, weave in end
Thigh: worked in the round, make 2
Rnd 1: 6 sc in magic ring (6)
Rnd 2: 2 sc increase in first st, sc in remaining sts around (7)
Rnds 3-5: sc in each st around (7)
Rnd 6: 2 sc increase in first st, sc in remaining sts (8)
Rnd 7-11: sc in each st around (8)
finish off, stuff lightly, weave yarn through the 8 sts, pull tight and tie off, leave yarn long for attaching to body
Calf: worked in the round, make 2
Rnd 1: 6 sc in magic ring (6)
Rnds 2-10: sc in each st around (6)
finish off, do not stuff, weave yarn through the 6 sts, pull tight and tie off, leave yarn long for assembly
Foot: make 2
ch3, turn
Row 1: sc in 2nd ch from hook, sc in next ch, ch 1, turn (2)
Row 2: increase in first st, sc in next st, ch 1, turn (3)
Row 3: increase in first st, sc in next 2 sts , ch 1, turn (4)
Rows 4-7: sc in each st across, ch 1, turn (4)
Row 8: ch3, sl st in 2nd ch from hook, sc in next 4 sts, ch 1, turn
Row 9: sc in first 3 sts, ch 1, turn (3)
Row 10: ch3, sl st in 2nd ch from hook, sc in first st, (ch 2, sl st in 2nd ch from hook, sc in next sc) twice
finish off, weave in end
Arms: worked in the round, make 2
Rnd 1: 6 sc in magic ring (6)
Rnds 2-6: sc in each st around (6)
Ch 1, turn, this begins the hand section
flatten opening of arm and work through both sides to close
Row 1: sc three times across (3)
Row 2: ch3, sl st in 2nd ch from hook, sc in first st, (ch 2, sl st in 2nd ch from hook, sc in next sc) twice (3picots)
finish off, weave in end
Assembly: use the images as a guide :)
The end of the thigh that was cinched closed is attached to the body at the rear with the other end pointing towards the front of the body. The cinched end of the calf is attached to the magic ring end of the thigh with the other end of the calf pointing towards the back of the body. It is easiest to attach these two parts while holding them next to each other or stacked on top of each other as opposed to holding them end to end. The foot is attached to the ankle with the toes facing towards the front. The arms are attached at the sides slightly towards the underside, but not quite underneath the body. Try to hold them against his body with the fingers pointing towards the front as you attach them so that they point forward as opposed to straight out to the sides.
Weave in any ends, and don't forget to kiss him!
Feel free to comment if you have any questions.