Translate

Wednesday, November 7, 2012

Spider Pavilion

I live about 40 minutes outside of the bustling city of Los Angeles, California.  Most of the time the spillover of urban issues bother me to the point where I want to move FAR away, but on occasion I am reminded of all the awesome things that also come part and parcel of being so near to "the city."

Over the past weekend my husband and I took our youngest son to the Natural History Museum of Los Angeles County to experience the yearly Spider Pavilion display.  Basically they have an enclosure similar to a small aviary where they release a bunch of exotic, web building spiders.  There are no cages, and no glass or barriers between the visitors and the spiders.  It is not the place for an arachnophobe.  It is however the place for me!  If you haven't guessed yet from the title of my blog, I happen to have an affinity for spiders.  It's a strange thing, I know, but before you close this window in disgust, allow me to say a few words on behalf of the "lowly" spider.

Firstly, spiders, similar to bees, demand a certain amount of respect.  While the creatures never seek to cause us any harm, we are all too aware of their innate ability to do so.  Especially when they are as large as the ones that were lurking in this pavilion!  In the spring time, the museum hosts a butterfly pavilion in the same location, and let me tell you, the museum goers walk much more cautiously when the spiders are loose!

Secondly, I genuinely have admiration for spiders and the beautiful webs that some of the orb weavers are able to create. Nothing is more peaceful to me than watching a spider spin its nearly perfect orb of silk.  There's just something hypnotic about a spider going around, and around in ever shrinking concentric circles.  And did you know that some spiders have golden silk?  Scroll down to the second picture, and if you're lucky you may be able to just barely make out the golden hue of the threads!  I can see it, but my husband can't.


Argiope aurantia


Nephila clavipes


AND, since this post hasn't been very crafty, I've decided to post this little crochet spider & web bookmark in honor of our little family outing.

I hope you've enjoyed this slightly different post, and I hope that I didn't frighten any of you too much with my creepy-crawly, not-so-little friends.
:)

Wednesday, October 31, 2012

Happy Halloween!

Happy Halloween everyone! 
 The crafting in my house is in full swing for this my most favorite of holidays.  However, I briefly wanted to share a trio of Halloween crocheted treats before I head out with the kiddos to collect our yearly bounty of candy goodness.


Have a good evening everyone!

Tuesday, October 30, 2012

A difficult time

Thinking about the devastation that has been caused by superstorm Sandy.  I am on the West coast and seemingly worlds away, but my thoughts are with the thousands people who are suffering and afraid right now.  I truly hope that our government steps up to help get these people back on their feet.  In addition, my heart goes out to anyone who has lost a loved one.  It is the worst pain anyone can feel.


Monday, October 29, 2012

free Jack 'O' Lantern coin purse pattern

In honor of Halloween, I whipped up this super quick, super easy pattern for a Jack o' lantern coin purse. 

Enjoy!


Jack o' lantern coin purse


 What I used: 2 different shades of orange worsted weight yarn (A&B), a G hook, scraps of black felt, a small amount of green worsted weight yarn, a coordinating 7 in. green zipper, two large black buttons, black embroidery thread, a tapestry needle, & a yarn needle.


In true Jack o' lantern fashion, I suggest you put your own spin on it!  You can use yellow felt if you want the lit up look, or perhaps you prefer a solid orange pumpkin, or even a white pumpkin!  Have fun with it!  

PATTERN
with A, ch 32 
(I made my coin purse rather large as I often like to use them as wallets, but if you prefer a smaller coin purse, I suggest you ch 28 for beginning chain, and work 27 sc across for all subsequent rows)
row 1: sc in 2nd ch from hk & each ch across (31)
row 2: ch1, turn, sc across (27)
switch to B
rows 3 & 4: repeat row 2
switch to A
rows 5 & 6: repeat row 2
continue pattern for 22 rows, finish off both colors (I suggest 18 if you are making a smaller version)

TIP: When switching colors in rows this way, I find it easier to drop one strand of yarn, work the next color, then pick up that yarn again, as opposed to finishing off at the end of each row.  This way there are WAY less ends to weave in!  Here is how I do that:  At the end of the row of one color, yarn over, pull up a loop, and pull tightly on that loop so your work is secured.  Next attach your next color and work your rows and finish off in the same way, also leaving a loop.  When you go to pick up the previous color, insert your hook in the loop and pull the loop snug around your hook.  Slip stitch up the side of your work until you are where you need to be (for this project I sl stitched twice), ch 1, and continue working the pattern!


Fold work in half with stripes running vertically.  Use a long length of orange yarn and a yarn needle to sew the sides closed, leaving the top open. 
Turn work inside out.
Attach Green just before one of the side seams along the top opening.

round 1: ch 1, sc around the top -- you will be working in the sides of your previous stitches  (the number of stitches doesn't really matter here, as long as you work as evenly as you can, trying not to decrease or increase the circumference)
round 2:  this round you will sc in each sc around, decreasing twice above each side seam for a total of 4 decreases, sl st in next st, finish off


Sew your zipper along the top opening using green yarn & a yarn needle.  Keep the stitches small enough where a coin cannot slip through. Since it is made in sc, there is no need for a liner, but one in a nice Halloween or Autumn fabric would look lovely!  I chose not to add a liner because I suck at sewing, and I was running short on time to get this posted before Halloween!


Clip off the excess section of zipper, & sew over the end a few times to ensure that it doesn't open. (I don't know if this last step is even necessary, but I always do it for good measure.)


Braid a few pieces of yarn as a zipper pull.
weave in ends

Next, design your face!  Play around with your design until you find one you like!  Cut out your shapes in black or yellow felt, and sew onto your coin purse using embroidery floss.  I sewed mine on using blanket stitch.  Add buttons, and whatever notions you'd like!


Trick-Or-Treat!

Sunday, October 28, 2012

Another Halloween-ish ATC

I don't normally expect to create a post exclusively for the purpose of sharing one single little itty bitty ATC, but I wanted to share this since I feel it is in the spirit of the season.  Besides it's a full moon tonight, which makes this perfect timing!

"Moon on a string"
The Moon actually dangles from the golden thread, 


and...
it flips over to reveal a crescent Moon.

The concept isn't mine, but the interpretation certainly is.  I do hope that the new owner of this ATC appreciates it, because I was really tempted to keep it.  I was even playing with the idea of making myself one, but I think I prefer it to be a one of a kind.  

:)

Tuesday, October 23, 2012

ATCs

I only recently learned about ATCs, or Artist Trading Cards, but I have become quite smitten with them.  They are miniature works of art that are fun to make and even funner to exchange!  (Yes, I know that "funner" is not a real word, but it should be! :P)
The standard size, as far as I know, is 2.5 x 3.5 inches or vice versa vice.  Same difference.   In my Monster Mash post, I posted a set of four collaged Halloweeny ATCs, but I really wanted to try my hand at hand drawing some.

Since I love owls, and they are sort of a Halloween animal, I decided they would make an excellent subject.
I painted a background on watercolor paper using watered down acrylics.  The owls are chalk pastel pencils on Bristol paper.  I have no idea if I'm supposed to combine those two, but its what I had laying around.
I originally thought that ATCs were 2 x 3 inches, but fortunately I discovered my mistake before any cutting or pasting occurred.
I almost always use images off the internet when I need reference material.  Occasionally, I'll use a lovely photo book or magazine.  


AND

Here they are all cut and pasted together!


I think they turned out simple yet cute.  Anyway, I'm happy to be drawing again.  I hope I keep it up because I need the practice!


Thursday, October 18, 2012

A candy corn bonanza!

Crafting for Halloween has definitely had a theme this year.  Candy corn!  Okay, so half of you are probably cringing while the other half's excitement is building.  Candy corn is one of those things that people either love or hate.  I used to belong to the latter group, but after working this pattern by Lion Brand (you will have register to access the free pattern) into this guy, I was hooked! (pun intended, hehee)

SO, I've been hooking candy corn left and right!  AND, I did some interesting variations...

 This fellow has bendable arms and legs.
His new owner tells me that he has been causing quite a bit of mischief!

This fellow has quite an appetite! 
 

For loose change!
I love making coin purses!  They are so useful and fun to make!  

Next we have the Candy corn Twins!
Made for my bestie's little twin boys!
(sorry the quality sucks on this one!)
They were originally going to be rattles, but the rattle device thingy that I had would have been too bulky and would have distorted their shape.  I'm a bit disappointed, but the babies don't seem to mind!

Lastly, I made one last Candy corn fella.  After all, I did get attached to these little guys, and decided that I needed one for myself.  Well, he'll probably end up mine.  I will be posting him for sale in my Etsy shop, but seeing as how Halloween is just around the corner, AND that I've never actually made any sales on Etsy, I figured he's as good as mine.  :)

Well thanks for making it to the end of this longish post!
See you next post!
:)


Thursday, October 11, 2012

Overlooked...monsters

I can't believe that I overlooked these guys!  Well, at least they have each other for company.  


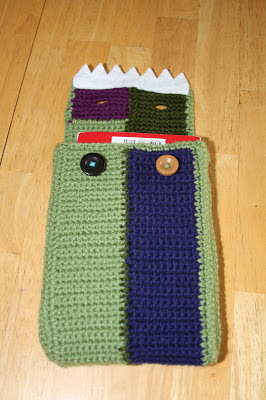
The larger pouch was made to gobble carry my swap partner's journal.  


The eyes are functional! (I am quite proud of that little detail.)


The coin purse...having a snack. 


Happily satisfied!


Monday, October 8, 2012

Monster Mash

If you haven't guessed by now, monsters are a recurring theme for me.  I guess I'm a monster-lover.  I recently made a little felt monster badge which I'd like to share with you, but I was afraid he may get a little lonely if I posted him by himself. As you all know, a lonely monster is just trouble waiting to happen, so I decide to also share some of the other monsters I've made this year (that I haven't already shared in another post.)
Here goes...

I pulled the image that I used for this off the internet. (I used Google's image search for 'kawaii monsters')

Here's an "in progress" shot with my dollar store scissors :)


I made this guy from a pattern that I wrote in an attempt to create a crocheted version of a Rebecca Danger style monster.

This is the original monster I made while writing up that pattern.  She now resides in Australia! Lucky gal!

This is the first crocheted monster chunk that I made.  He is much smaller than Blossom!


And lastly, a set of  Halloween monster ATC's, or artist trading cards.  

This was my first time making ATCs, but I sure had a blast making them.  I don't have much experience with paper crafting (as you can tell,) but I definitely think that it is something that I'm going to do more often.

Anyway, I hope you enjoyed my monsters!